
Latest Gear Live Videos
How to upgrade your iTunes purchases to DRM-free iTunes Plus

Posted by Andru Edwards Categories: Apple, Features, Music, Software,
Earlier today during the MacWorld 2009 keynote, Apple announced that the iTunes Store was on the way to completely dropping DRM. As of today, 8,000,000 of the 10,000,000 tracks are now available as DRM-free iTunes Plus tracks, and that even includes music videos. We figured we’d give you a quick look at how you go about upgrading your library of purchased content.

So the first thing you want to do is go to the iTunes Store, and look on the right-hand side. You’ll see “iTunes Plus” as one of the links, with a number next to it. That number represents the number of pieces of content that you have available that can be upgraded. Click on that.
Click to continue reading How to upgrade your iTunes purchases to DRM-free iTunes Plus
Advertisement
Bleeding Edge TV 264: Install a hard drive in a Mac Pro
Posted by Andru Edwards Categories: Gizmatic, Short Bytes, Apple, Features, Mods / Hacks, PC / Laptop, Podcasts, Storage, Videocasts,
A quick and simple way to set up fast Time Machine backups on your Mac Pro, or more storage for all those Bleeding Edge episodes you’ve been downloading, is to add in more hard drives. Thankfully, Apple has made the upgrade path to accomplishing this super simple. In this episode, we show you the step-by-step process that is takes to install a new hard drive in your Mac Pro in under 5 minutes. All you need is a Mac Pro, a Philips screwdriver, and a SATA hard drive. Oh, and of course a few minutes of spare time. It really is that easy. Hit up the video for the proof, and let us know what you think.
A big thank you goes out to HP for sponsoring this episode.
Bleeding Edge TV 192: SanDisk Sansa TakeTV Setup
Posted by Andru Edwards Categories: Gizmatic, Short Bytes, Features, Home Entertainment, PC / Laptop, Podcasts, Portable Audio / Video, Videocasts,
So, a few days ago, we hit you with our TakeTV unboxing video, where we showed you everything that was inside the SanDisk Sansa TakeTV package. Today we wanted to follow it up and show you how you go about setting the thing up, just to prove that it really is as simple as it looks. We hook up the TakeTV device to our Samsing LCD HDTV in under a minute.
Stay tuned - we will have another video up in a couple of days that shows the actual usage of the device - putting videos on it, playing them through the dock, etc.
DIY Features Halloween Projects

Posted by Sheila Franklin Categories: Smart Home, Misc. Tech, Science,
 There are only about 3 weeks left until All Hallows Eve, so if you want to get adventurous this year be sure to check out the Special Halloween Edition from the editors of “Make” and “Craft ” for the holiday. Inside, you’ll learn how to make flaming LED skulls, laser jack-’o-lanterns, and mechanical ghoulies. You can also find makeup and a recipe for blood-spurting wounds as well as DIY coffins, tombstones, and decorations. All this (and a trip or two to Radio Shack) is available for $9.99.
Read More  | Make
Sprouting and Dehydrating Seeds and Grains

Posted by Jenni Burns Categories: How To, Grains, Vegan, Vegetarian, America, Dehydration,

Sprouting grains and seeds is easy and fun. The health benefits are well worth the extra work. You can sprout wheat berries, barley, buckwheat, alfalfa, sesame seeds, and flax seeds, to name a few. When the seed or grain sprouts, nutrients are released during the growing process that are not present in the seed or grain by itself. By sprouting, dehydrating, then grinding your grains, you are creating flour that is many times more nutrient rich than any flour you can purchase in the store. I love watching my food grow, it’s inspiring!
Step 1: Soaking
The first step is to soak the seeds or grains. Place the seeds or grains in a large pot overnight (the size of the pot depends on how much flour or sprouts you will need, keep in mind that soaking causes the grains to expand as they absorb the water).
Step 2: Rinsing
After the overnight soak, you will want to pour your grains into a colander, about half full, and rinse. When I rinse them I like to get my hands in there to mix it up to make sure that all the grains are well rinsed. Do this 2-3 times a day until the sprouts form, you want the sprout to be about 1/4 inch in length. Each seed and grain has a different germination phase. Wheat berries take around 48 hours while quinoa sprouts in as little as 12 hours.

Step 3: Dehydrating
Depending on what you are planning to use the sprouts for, you may or may not choose to dehydrate your seeds or grains. I use my sprouted wheat to make bread flour and buckwheat to make Buckwheatie Bars. Dehydrating is simple. Just give the sprouts one last rinse and place them on the dehydrating trays. It usually only takes around 4-6 hours to dry. Use your dehydrated sprouts quickly, or store in an airtight container in the refrigerator up to a month or so.
Bleeding Edge TV 179: How To Mod Your iPhone on Windows Using iBrickr
Posted by Andru Edwards Categories: Hack Attack, Short Bytes, Apple, Cell Phones, Features, Mods / Hacks, Podcasts, Portable Audio / Video, Software, Videocasts, Videos,
Okay, we know that since Apple released the iPhone, you’ve all been wanting to modify it to do your bidding. Over on the OS X side of things, we have iFuntastic, which provides a slick GUI interface for modding your device. New to the Windows side of things is iBrickr. iBrickr is the Windows application that makes it dead simple to modify your iPhone, add and manage custom ringtones, and install third-party applications. We give you a full tutorial of how it all works in this episode.
Read More | iBrickr
Bleeding Edge TV 178: New iMac RAM Upgrade On The Cheap
Posted by Andru Edwards Categories: Full Episodes, Gizmatic, Design, Features, PC / Laptop, Portable Audio / Video, Videocasts, Videos,
While the release of the newly redesigned aluminum and glass iMac have been fantastic, the fact that they ship with just 1 GB of RAM by default isn’t so exciting. We knew immediately that this called for a RAM upgrade in the iMac, and we were happy to find that installation has gotten easier and easier as new iMac models are released (although there is a particular spot of trouble, which is featured at the end of the video in the outtakes.) In the past, we been both disappointed and delighted with iMac RAM installation. In this episode, we show you how to upgrade the RAM in the new iMac in a step-by-step manner - at a far less expensive price than you would have to pay Apple to do it. Hit the video for the full scoop.
How To: Change iPhone Email Signature
Posted by Andru Edwards Categories: Apple, Smartphones, Software,
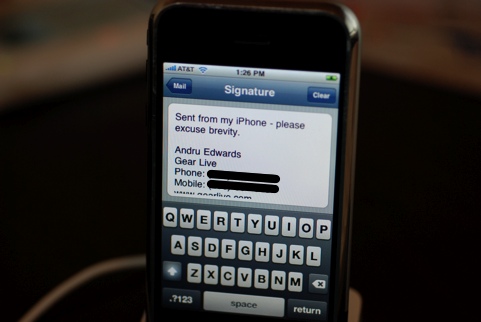
We’ve been using our iPhone for answering many an email while on the go, and one question we hear from other iPhone owners deals with how we changed the “Sent from my iPhone” text from the email signature. We figured a quick how to was in order. It’s quite simple, really, but if you tend to stay away from the Settings menu, then you would never see it. From the iPhone home screen, hit Settings, and then scroll down and tap Mail. You will see a Signature area that you can tap. Once you do this, you are editing your iPhone signature. You can get rid of the default altogether and roll with no signature at all if you like, or you can edit it to your specific preference.
Whatever you end up putting there will be used in both new emails as well as any responses you send. Let us know what you end up putting in your iPhone signature in the comments.
DIY: The LED Picnic Blanket

Posted by Lolita Beckwith Categories: Misc. Tech, Mods / Hacks,

We at Gear Live rarely cater to the craftsy, DIY, “Maker Faire”-types (you know who you are), so here’s a little something for you: The LED Picnic Blanket. It’s a water-resistant blanket that glows with romantic lights, perfect for an evening date with that special someone. Plus, it has a hard center, so that sangria won’t spill all over the grass and ruin the mood. Being more gadgety than craftsy, we wish we could just buy this blanket, but until someone patents it, click below to learn how to make it.
Read More | Instructables via Craftzine
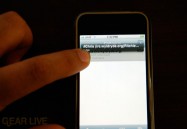
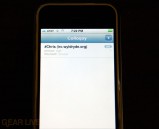
How To: Use IRC On The iPhone With Colloquy
Posted by Andru Edwards Categories: Apple, Smartphones, Internet, Mods / Hacks, Software,

Since the iPhone launched, we have been on the lookout for all the cool web apps that we were sure would begin to show up. We have had quite a few come along, but just a few minutes ago we were able to log in to IRC on our iPhone, and thought that was pretty nifty. So much so, in fact, that I thought we’d share the process on how to do it yourself. Do note, though, that we used Colloquy to help us out here - that is an OS X application, so you do need a Mac to use this method.
So, here are the steps you want to take:
Click to continue reading How To: Use IRC On The iPhone With Colloquy
Gallery:


Advertisement
© Gear Live Inc. {year} – User-posted content, unless source is quoted, is licensed under a Creative Commons Public Domain License. Gear Live graphics, logos, designs, page headers, button icons, videos, articles, blogs, forums, scripts and other service names are the trademarks of Gear Live Inc.