
Latest Gear Live Videos
How to unlock the iPhone 4s for free (Instructions)

Posted by Andrey Malskiy Categories: Apple, Smartphones, Mods / Hacks,

Are you walking around with an iPhone that shackled to a mobile carrier that you'd like to free? Well, there's now a super-easy way to unlock any iPhone running iOS 5.1 or earlier. Yes, that includes unlocking the iPhone 4S. Through a series of persistent hacking, a programmer who goes by the moniker of Loktar_Sun has finally found a way of spoofing the iPhone, thus allowing the user to unlock the device. A few things are needed in order to get started: You've got to jailbreak your iPhone (one that isn’t officially blacklisted), the free unlocking app (SAM) from Cydia, and an Internet connection. Read on for instructions.
Click to continue reading How to unlock the iPhone 4s for free (Instructions)
Read More  | Blogspot
Advertisement
How to bring Siri to your Mac

Posted by Andru Edwards Categories: Apple, Software,

Siri has been relegated to the confines of the iPhone 4S for the past six months, while many a new iPad owner and Mountain Lion beta tester have wondered what's taking Apple so long to release the feature from beta. For those of you running the latest version of OS X, Reddit user Moosehadley figured out that you can inject Siri's female voice right into OS X Lion (we've confirmed that this works for Mountain Lion as well.) All you need to do is go into System Preferences > Speech > Text to Speech. Use the System Voice pulldown, and choose Customize. From the list, select "Samantha" and let it install. This is the same voice used for Siri, and should hold you over until her full functionality makes it to the Mac.
Ask Andru: How can I make my iPad louder?
In today's Ask Andru column, we get a question about an issue with the iPad that we've actually experienced ourselves for years. Ever since the release of the original iPad, it's been painfully obvious that the speaker on the Apple tablet isn't exactly up to snuff. It's fine if you're somewhere quiet, but go somewhere that has any ambient noise, and all of a sudden it's a challenge to enjoy any audio-based entertainment. So, on to the submitted question:
I love my new iPad, but I wish it were louder. It seems that everything about the new iPad is high-quality, with the exception of the speaker! Is there any way I can get more volume out of this thing?
I hear you! As I said earlier, the low volume issue has been around since the very first iPad. When the iPad 2 was released, the speaker grille was larger, and many assumed that this meant that the device would be louder. Unfortunately, despite the visual cue, the iPad 2 suffered from the same issue, and the new third-generation model (see our new iPad review) seems to have the exact same speaker as its predecessor. Luckily, there are a few things you can do to alleviate the frustration.
Click to continue reading Ask Andru: How can I make my iPad louder?
How to remove dents from your car using dry ice
Posted by Andrey Malskiy Categories: Misc. Tech, Transportation,

There's an urban legend out there that says that you can repair door dings and dents that you find on your car by rubbing dry ice over the dent and then heating it with a hair dryer or heat gun.Sure, it sounds a little silly, but as it turns out, it works!
Roaming the various threads and comments on VW Vortex, we came across a creative tutorial showing how the process works in removing and smoothing out dents. Hit the link to see how it’s done, thanks to the thread found on VWVortex.
Click to continue reading How to remove dents from your car using dry ice
Read More | VW Vortex
How to fix: Apps Installed on the iPhone could not be Determined
Posted by Andru Edwards Categories: Apple, Features, PC / Laptop, Software,
I've been putting up with an annoying iTunes error when trying to sync my iPhone 4S. The sync always fails, telling me that it's because "Apps installed on the iPhone could not be determined" - We figured there were others out there receiving the same message, so we wanted to share how we fixed it. The problem would always start with iTunes attempting to transfer apps from the iPhone that it says weren't in the iTunes library - however, this is incorrect, as each time it wanted to transfer over all 153 apps from the iPhone. After the transfer started, the error would appear. Here are some things you can try if you're experiencing the same problem:
First, make sure you're running the latest version of iOS and iTunes. Restart your iPhone (or other iOS device) by holding down the home button and the sleep/wake button at the same time until the Apple logo appears. While it's rebooting, quit and restart iTunes. For some, this will usually fix the problem, but for us it didn't.
The next step is to reboot your computer. When it's back up, launch iTunes and update all apps in iTunes and do the same on your iPhone. Once this is done and both devices have the latest version of the apps that you own, connect your iPhone (and be sure you're using a first-party Apple sync cable) and attempt to sync. This will fix the issue if your iPhone and iTunes each have different versions of an app that might be corrupt. However, in our case, things were still failing. In this case, I had to watch the iTunes status during the sync and noticed that the error came up when it attempted to sync the Price is Right app. I manually deleted it from my phone, synced again, and it worked just fine.
Hope this saves some of you guys out there some frustration!
How to install Windows 8 Consumer Preview
Posted by Andrey Malskiy Categories: Microsoft, Software,
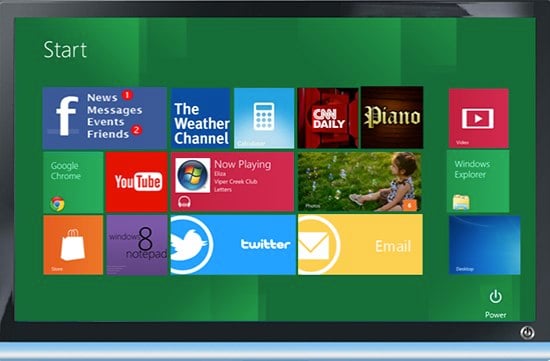
You’ve heard the buzz and most of you have followed it and it’s finally here; Windows 8 is finally available for a public download as a Consumer Preview. But before you facepalm yourself over the instructions and long tedious Microsoft installations we’re all used too, you can breathe a sigh of relief. Why? Because no external hard-drives, DVDs or USBs are needed; all you need is an Internet connection and you’re a few steps away from running Windows 8 on your PC! Thanks to the guys over at The Verge, just follow the instructions and the process shouldn't be too bad.
Read More | The Verge
How to export files from an iPhone using iExplorer
Posted by Andrey Malskiy Categories: Smartphones, Features, Software,

As we've told you previously, iExplorer is a piece of free software allows you to browse the contents of your iPhone for select files. The nice thing is that iExplorer even lets you export files that were created and saved in third-party apps. In this tutorial, we show you how to do that yourself. As a point of reference we’ll be using MusicBox, a Rhapsody-type of serivce. Follow these few steps, and you’ll be on your way to moving files to and from your iPhone with ease.
Click to continue reading How to export files from an iPhone using iExplorer
How to delete your Google Web History before tomorrow’s privacy policy change
Posted by Andrey Malskiy Categories: Features, Google, Internet,
 On March 1st (that's tomorrow!), Google will be changing its privacy settings. The changes will unify all Google services under one umbrella, as far as privacy is concerned. In other words, what you search for on YouTube will be accessible by Google Search, and all other Google services. As of today, all your site and search history stayed sandboxed within the specific services that you used. Tomorrow, that'll be a different story.
Your search and activity history can obviously reveal a lot of personal data that you may not want Google to know. Things like medical conditions, location, personal habits, and more. That said, there are a few easy steps you can take to keep your search history private and outta Google’s reach. Taking these steps does not prevent Google from gathering and storing this information internally, and doesn't change the fact that this information can be requested and possibly turned over to law enforcement for legal matters. However, what it does do is make it so that Google anonymizes the information after 18 months, and that Google doesn't use your web history to offer you customized search results. With Web History enabled, Google will keep your records indefinitely. Keep on reading for a walkthrough!
How to create free iPhone ringtones with iTunes
Posted by Andrey Malskiy Categories: Apple, Smartphones, Features, Handhelds, Software,
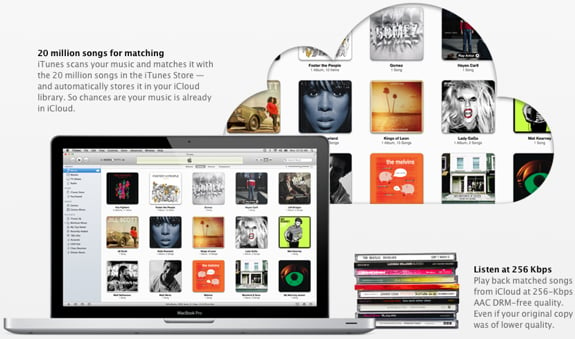
With recent updates to iTunes, Apple removed the native funtion that allowed you to create ringtones from the songs you've purchased. You can still purchase ringtones directly from iTunes for about a buck, but seriously, who would wanna pay a $1 for a 30 second clip of music that will get old in three weeks? That's where we step in and bring you our tutorial on how to use iTunes to create iPhone ringtones using any track you've got in your library, completely for free. Yep - you aren't limited just to tracks purchased from iTunes, and you don't have to give up any money that would be better spent on something at the dollar menu at the nearest drive-thru. Read on for our full walkthrough!
Click to continue reading How to create free iPhone ringtones with iTunes
Bleeding Edge TV 410: Apple iMac RAM upgrade tutorial
Posted by Andru Edwards Categories: Full Episodes, Gizmatic, Apple, Features, PC / Laptop, Podcasts, Videocasts, Videos,
In this episode we teach you how to install RAM in your Apple iMac. The model we are using is the 27-inch 2011 iMac, which has a quad-core processor and supports up to 4 RAM chips. Installing your own RAM is an easy way to save a lot of money, rather than paying for the extra RAM with the iMac. In our case, we install 16 GB of RAM in under 5 minutes, saving ourselves over $500 in the process - and it is so easy that anyone can do it, and all you need is a Philips screwdriver and a little courage.
As you see in the video, all you need to do is unscrew the RAM cover, and pull on the tabs to remove the RAM that ships with the iMac. From there, you simple insert the new RAM, push it in until it clicks, and reinstall the cover. Turn it on, and go into About This Mac to get a look at the amount of RAM that your system is recognizing. If it is showing the amount you installed, you are done! Even better, you just saved yourself a bunch of cash as well. You can pick up the RAM at Amazon for a great price, and of course, the iMac is there as well.
Big thank you to MozyPro and JackThreads for sponsoring the show - be sure to check them out! MozyPro provides simple, automatic, and secure data backup. As for JackThreads, we've got exclusive invite codes that give you $5 to use towards anything you'd like on the site.


Advertisement
© Gear Live Inc. {year} – User-posted content, unless source is quoted, is licensed under a Creative Commons Public Domain License. Gear Live graphics, logos, designs, page headers, button icons, videos, articles, blogs, forums, scripts and other service names are the trademarks of Gear Live Inc.